

Are you using a UC Browser on your smartphone?
Well, UC is cool, but for optimum performance and to bypass IP blocks, you may sometimes need a proxy server. It will also help you shorten the web page while you send it.
To access the proxy server, you can use the manual settings. Also, you can get it done with other websites, softwares or apps.
Moreover, you may need to change the proxy settings in the UC browser sometimes. Let’s dig deep and find out how to change proxy settings in the UC browser on Android.
A complete guide to change proxy settings in the UC browser on Android
First of all, you have to choose the process you want to follow. It will require some minutes to change the proxy settings. Bear with us, and you will know the changing process of proxy settings.
Steps to change proxy settings manually
- If you don’t have a UC browser, you have to download and install it on your android device.
- Tap on the Browser menu and select ‘Settings’.
- After opening the ‘settings’ option, you have to look into the side tab. Choose the ‘Other’ option.
- Click on the ‘Network’ button. You need to tap into ‘Change Proxy Settings.
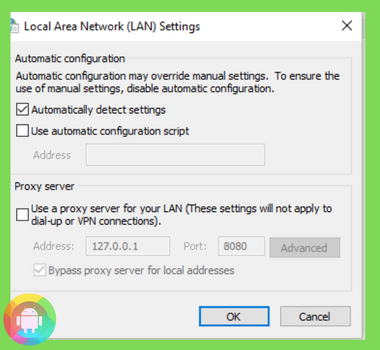
- If you want to change your Local Area Network (LAN) settings, you have to choose the proxy settings.
- Moreover, you need to write the IP address and port number. You can change the proxy settings by choosing VPN or Dial Name. Along with that, choose ‘Settings’.
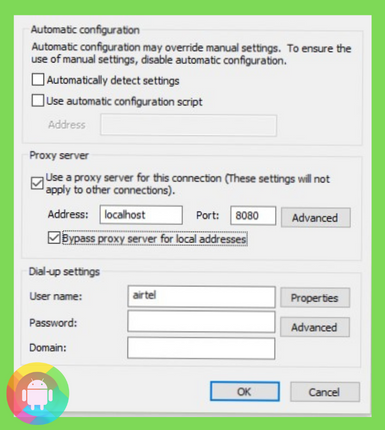
- Finally, you have to change the proxy server. Again write the IP address and port number. Also, you have to write your username and password. Save the proxy settings. Now you can use your UC browser on Android.
Steps to change proxy with ProxyElite
For changing proxy settings in the UC browser, you can choose the ProxyElite website. Because it comes up with premium service.
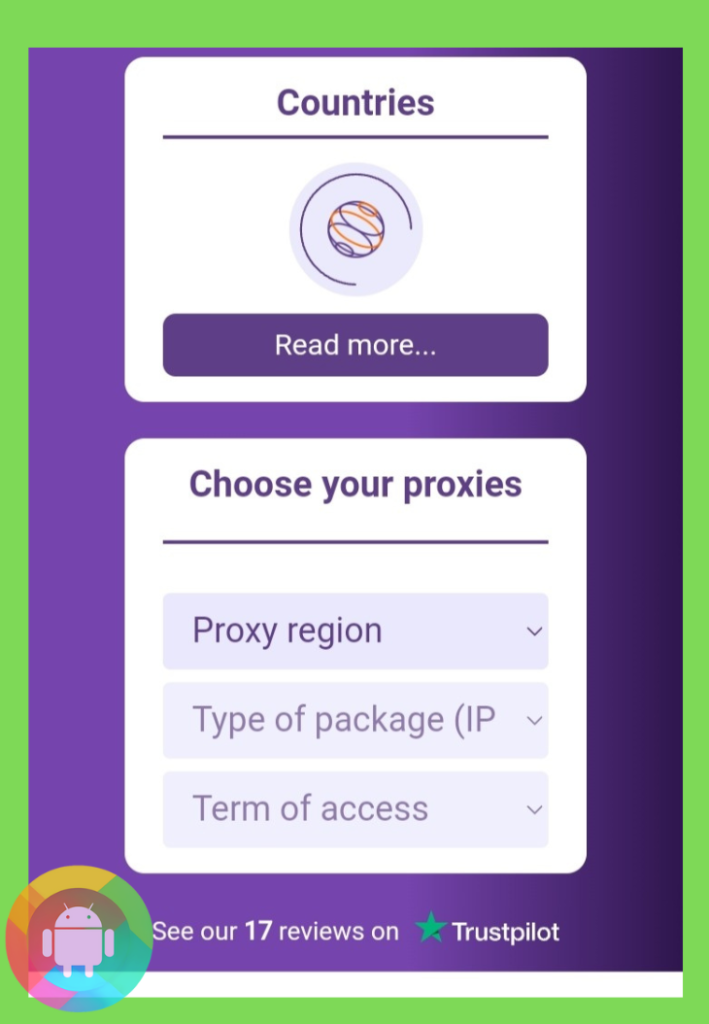
- Go to ProxyElite on your UC browser. You will find several tariff plans for different IP addresses.
- Hereafter, you have to choose your proxies. To begin with the process, you need to click on ‘Proxy Region’ and pick where you live.
- Then enter the ‘Type of IP package’ and ‘term of access’.
- At this point, you have to click on ‘Buy Proxy Package’.
- Open the LAN settings of the UC browser and change the IP address into the ProxyElite premium IP package.
Steps to change a proxy with SmartProxy
This website comes up with an easy proxy setting for the UC browsers. Let’s begin with the process.

- Open the SmartProxy website. You have to purchase a proxy plan from the SmartProxy website. It will give you a personalized hostname and port number.
- Go to the ‘Settings’ option of your android device. Moreover, you have to choose the ‘wifi’ option.
- Press into the ‘Network Name’ and choose ‘Modify Network’.
- Nevertheless, you must tap on ‘Advanced Options’ and select ‘Manual’.
- You can change the proxy settings with the personalized hostname and port number from SmartProxy. Lastly, you have to click on ‘Save’.
Steps to set up a proxy with ProxyDroid
It is a software application. You can use it to change your proxy settings.

- First of all, go to the ‘Google Play Store and search for ‘ProxyDroid’. The app will appear on the top. You have to install it on your android device. After installing it, you have to open the app.
- Enter the proxy server address and port number.
- Then you have to click on the ‘Proxy Type’ and choose one.
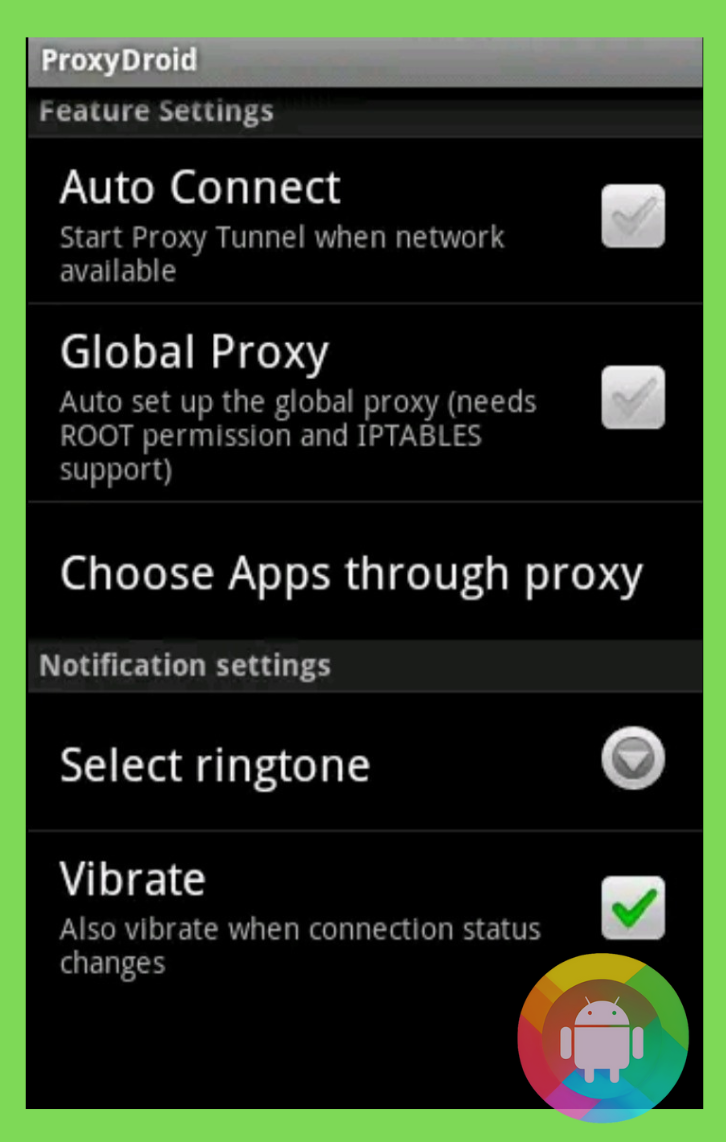
- Right now, you need to open the ‘Global Proxy’ option.
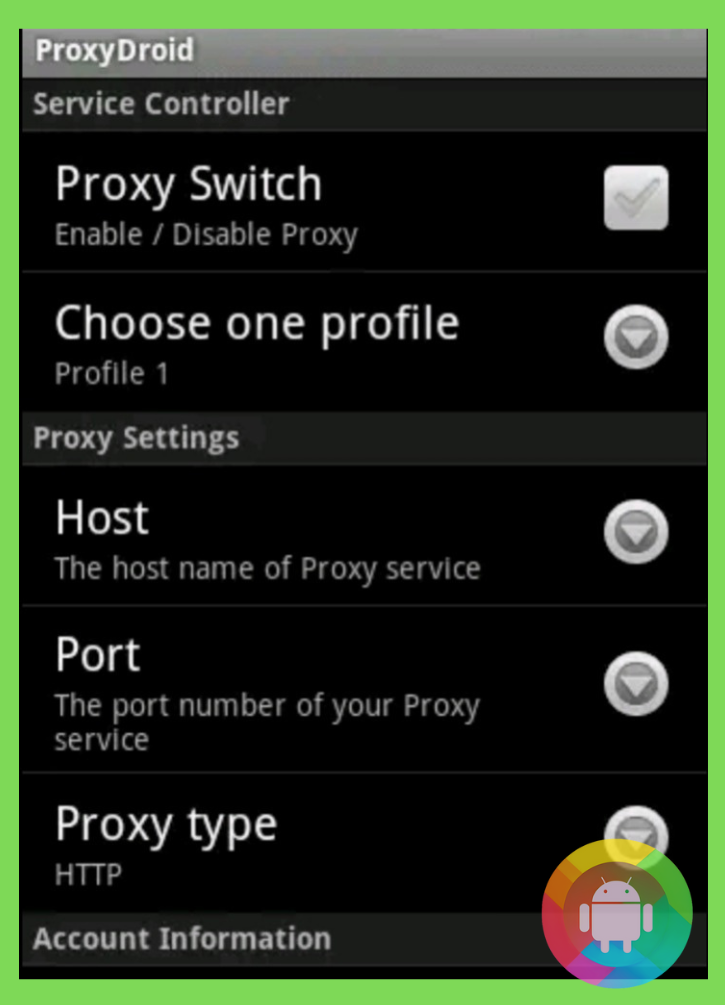
- Click on the Proxy switch to turn it on. It can change the proxy settings for all browsers, including UC.
Final thoughts
After all, you know how to change proxy settings in the UC browser on Android. If you follow any of these, you can change the proxy settings easily. We hope it will help you.
You can choose premium websites like ProxyElite and SmartProxy for secure internet surfing. If you can’t purchase the premium packages, then you can go with the manual or ProxyDroid app. Take care.
Frequently Asked Questions (FAQs)
What is a Proxy Server for browsers?
The proxy server allows you to make a strong connection between the android device and the internet connection.
Along with that, it helps you to use a safe and secure internet connection. It protects your personal data, files, and browsing history.
How to find the proxy server address on the phone?
For finding the proxy server address, you have to check the LAN settings on your android device. You will find the proxy server address, port number, and hostname.
Should proxy settings be on or off?
It is not necessary to keep it on. So, you can turn the proxy settings off anytime you want.
Recent Posts
Blog Introduction: If you're playing an app on your Android smartphone and it comes with an OBB file, you may wonder how to open it. OBB files are data files for certain Android apps, just like APK...
Qlink phone is a blessing for anyone who needs the smartphone service badly but can't afford the costly packages to use it. Through this free service phone or the Qlink phone, the user can choose any...